Recommendation Containers
Map storefront placements to one or more recommendation models — no code changes
A recommendation container is a configurable placement that displays product recommendations to shoppers. Think of a container as a "widget" on the page: it has a defined location, it is connected to one or more recommendation models, and it can be enabled or disabled independently. The models inside it determine which products get shown.
What it solves
A model produces a ranked list of products, but it doesn't know which page it is serving. Containers are the mapping layer that connects models to placements. The storefront calls a container by its ID and gets back recommendations from whichever model(s) are assigned to it — so you can change what shoppers see without touching storefront code.
Key concepts
Container — a named placement that returns recommendations. The storefront references a container by its ID; MXP serves it from the models currently assigned.
Placement (page type) — the context the container serves, such as a product detail page (PDP) or product listing page (PLP). The placement is set when you create the container.
Model slot — a container holds one or more slots, and each slot is assigned a recommendation model. To change what a placement serves, reassign the slot rather than changing the storefront call.
A container can hold more than one model. When multiple models are active in a container, MXP combines their outputs before returning results.
Managing recommendation containers
Containers are managed from Recommendation → Recommendation Containers in MXP UI.
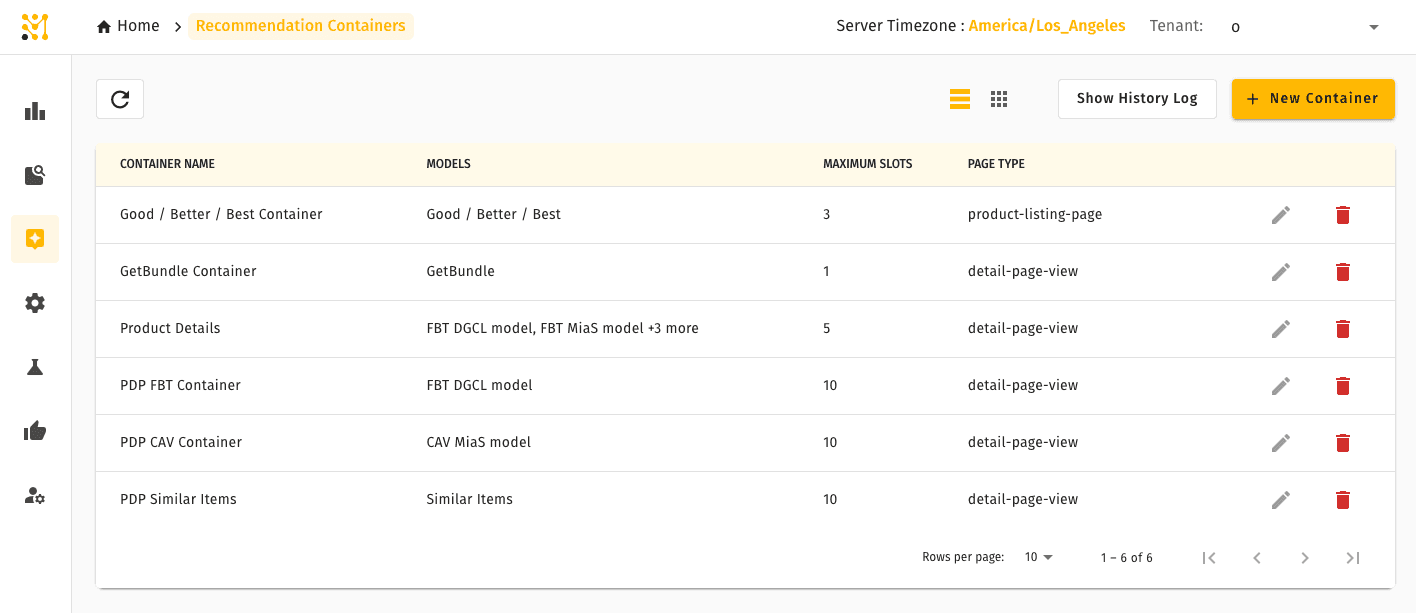
Creating a container
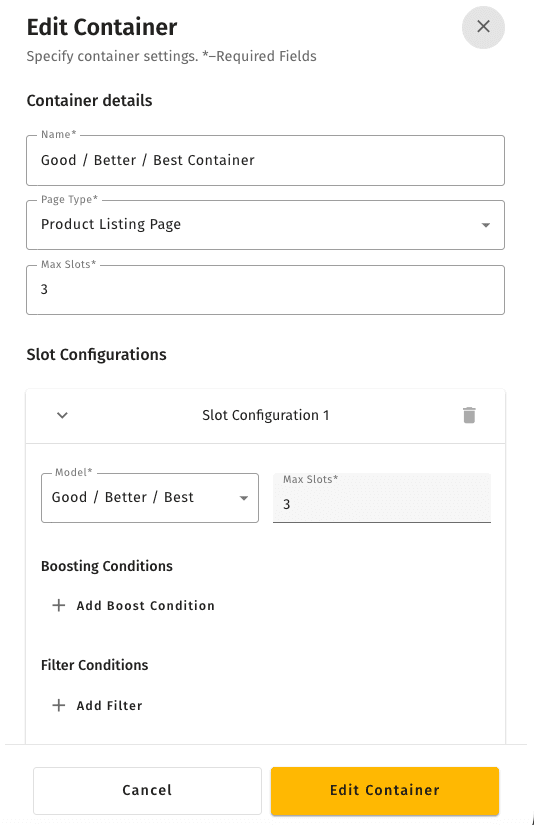
Editing a container
Deleting a container
Quick example
A team wants to show "Frequently Bought Together" on the cart page. They deploy the FBT model, create a container for the cart placement, and assign the FBT model to it. The storefront's cart component calls that container's ID. Later, they swap in a newly tuned model by editing the container — no storefront change needed.
Recommendation Containers is part of the full MXP platform and is not available in Lightweight mode. In a Lightweight deployment, a recommendation Serving Configuration points directly at a model instead.
Related pages
- Recommendation Models — the models you assign to containers
- Recommendation Rules — boost, bury, or filter what containers return
- Recommendations overview — how the full system fits together